Cursos de música online

Una lista de cursos online de música que me han parecido interesantes. He completado casi todos ellos, aunque a veces no se puede llegar a un título oficial sin pagar la matrícula. Comento cada uno por separado. Por comodidad, incluyo una valoración numérica de la calidad y facilidad de cada uno (¡totalmente subjetivas!)

TEORÍA MUSICAL

Musicianship: Tensions, Harmonic Function, and Modal Interchange

Calidad: 9/10. Facilidad: 9/10

Del Berklee College of Music. Profesor: George W. Russell, Jr. Ideal para iniciarse en las armonías del jazz. Desde el principio el profesor se impone un entorno muy restringido, para que todo quede muy claro. Acordes diatónicos, modo mayor casi siempre, y tono de mi bemol (creo recordar). Profesor muy simpático y carismático. En coursera.

Jazz Improvisation

Calidad: 9/10. Facilidad: 3/10

Del Berklee College of Music.Todo lo contrario al anterior. Endiablado, muy difícil. Por otro lado, hay material para años aquí. El profesor, Gary Burton, es un virtuoso del vibráfono; como profesor se esfuerza, pero a menudo no es fácil seguirle. Este es un ejercicio mío con improvisaciones en los distintos modos diatónicos. En coursera.

Write Like Mozart: An Introduction to Classical Music Composition

Calidad: 10/10. Facilidad: 7/10

De la National University of Singapore. Profesor: Peter Edwards. Muy buena introducción a la música del periodo clásico (Haydn, Beethoven, Mozart…). Nivel medio, hace falta cierta familiaridad con el solfeo. Pero realmente te enseña a escuchar la música de este periodo. El profesor es muy bueno, se esfuerza por explicar todo bien. En coursera. Aquí dejo mi composición final.

Approaching Music Theory: Melodic Forms and Simple Harmony

Calidad: 9/10. Facilidad: 8/10

De California Institute of the Arts. Profesor: Marc Lowenstein. Panorámica muy refrescante sobre la música general, desde el gregoriano hasta la música contemporánea, desde Europa hasta el gamelán de Indonesia. Nivel no muy alto, así que no puede profundizar con un temario tan amplio. En coursera. El profesor es divertidísimo, está muy loco; tiene una extraña fijación con los wombats (el marsupial, no el grupo de rock). Me hizo componer como Mozart, como Brahms, contemporáneo, estilo Glass

COMPOSICIÓN, MÚSICA POPULAR

Songwriting: Writing the Lyrics

Calidad: 10/10. Facilidad: 8/10

Del Berklee College of Music. Se centra en exclusiva sobre letras. Muy buen curso, ideas muy útiles para dar con letras interesantes, que incluso pueden dar pistas sobre melodía y armonía. Pat Pattison, un muy buen profesor y un conocido experto en el campo, con varios libros sobre composición de letras. Lo malo: tantos y tantos errores que se pueden detectar en letras después de haber tomado el curso. En coursera.

Songwriting: Writing the Music

Del Berklee College of Music. Profesora: Scarlet Keys. En coursera. No lo he tomado aún.

PRODUCCIÓN

Arranging for Songwriters

Calidad: 7/10. Facilidad: 10/10

Del Berklee College of Music. Profesoras: Sarah Brindell y Bonnie Hayes. Buenas profesoras, un curso bastante fácil y amable donde se ven distintas ideas a la hora de arreglar temas. No me gustó mucho que traten Shape of You como si fuera la octava maravilla, cuando (en mi opinión) es una canción pop bastante normal (este análisis, por cierto, me gusta). En coursera.

Pro Tools Basics

Calidad: 8/10. Facilidad: 8/10

Del Berklee College of Music. Profesora: Chrissy Tignor. Curso técnico sobre el Pro Tools. Nivel básico, muy bien explicado por la profesora. Orientado a música electrónica con voces, pero muchas ideas valen para otros tipos. En coursera. La pega es que la versión de Pro Tools gratuita, Pro Tools First, carecía de bastantes efectos; lo que es peor, no era compatible con muchos add-ons populares que son gratuitos. (Da igual, porque parece que hace muy poco, esta versión ya no está disponible). En mi opinión, los DAWs gratuitos más completos son, ahora mismo, reaper y cakewalk.

Introduction to Ableton Live

Calidad: 8/10. Facilidad: 8/10

Del Berklee College of Music. Profesora: Erin Barra, muy clara y didáctica. El problema no es tanto el curso en sí, que está muy bien, sino la orientación. Ableton se puede usar como un DAW convencional, pero también es una especie de instrumento de mezclas. Realmente, está muy enfocado a los loops para música de baile y hip-hop, y muchos trucos asociados. Aun así, los loops son muy útiles para montar versiones preliminares de canciones en minutos. En coursera.

INSTRUMENTOS

Singing Popular Music

Calidad: 8/10. Facilidad: 8/10 (provisional!!!)

¡ En proceso ! Del Berklee College of Music. Profesora: Jeannie Gagne. De momento, me parece buena profesora (canta increíblemente, claro. Tiene muchos vídeos en su canal de YouTube). En coursera.

Latex, Beamer, Python, Beauty

all models are wrong

This post quickly shows how to create pretty latex beamer slides, that don’t look anything much like maths seminar slides, and  that can include well formatted (Python) code, as well as the normal stuff that Beamer is so good at (maths, videos, etc). I’m assuming you’ve got a `standard’ install of latex (by standard I mean: like mine) that includes beamer and the listings package. I’m also assuming that you already know how to use beamer, so I’ve not included all the documentclass junk and so on. Here’s a taster of what it looks like, how to do it is after the break:

beamer_screen

View original post 444 more words

Boring stuff

The previous equation is still too general, and a connection between stress and strain is still needed. Here we consider the case in which there is a linear relationship between both, which involves the coefficient of viscosity.

To begin with, let us consider a simple case in which a fluid is confined between two planes. One of them moves sideways with a certain speed u_0, while the other is kept fixed. After a certain transient, some force is needed in order to keep this shearing. The simplest expression is

F= \mu A \frac{u_0}{L}.

The force is proportional to the area and to the velocity difference between the planes. It is also inversely proportional to their separation, L (this fact being the least obvious). Finally, a constant of proportionality is given by \mu, the viscosity coefficient, or

simply “the viscosity”. This constant may vary with temperature, density, pressure, but the point with Newtonian fluids is that it does not vary with the velocity field (or its derivatives).

Later, in section …, this flow will be solved as a solution of the Navier-Stokes equations, the Couette flow. There, it will be shown that the velocity is everywhere in the direction of the force exerted on the upper plane, let us call it $x$, and varies linearly between the planes, in the y direction. Therefore, the only components of the strain rate tensor are \epsilon_{xy} = \epsilon_{yx} = u_0 / ( 2 L ). We therefore have

\tau_{xy} = \mu \epsilon_{xy}.

With this in mind, let us look for a general relationship between \tau and    \epsilon. This is much easier if we go to the principal strain axes. These are the coordinates on which the strain rate is diagonal. Such coordinate system always exist, since the strain rate tensor is symmetric. Notice that in these system strains are not due to shear, only to dilations.

Better with stock pictures

pexels-photo-164531.jpeg

“A connection is needed”. Photo by Pixabay on Pexels.com


The previous equation is still too general, and a connection between stress and strain is still needed. Here we consider the case in which there is a linear relationship between both, which involves the coefficient of viscosity.


honey on white bowl

Holy cow, is honey viscous or what. Photo by Pixabay on Pexels.com

To begin with, let us consider a simple case in which a fluid is confined between two planes. One of them moves sideways with a certain speed u_0, while the other is kept fixed. After a certain transient, some force is needed in order to keep this shearing. The simplest expression is

F= \mu A \frac{u_0}{L}.


The force is proportional to the area and to the velocity difference between the planes. It is also inversely proportional to their separation, L (this fact being the least obvious). Finally, a constant of proportionality is given by \mu, the viscosity coefficient, or

action balls black and white illustration

Newton’s craddle. Another of this guy’s creations. Photo by Pixabay on Pexels.com

simply  “the viscosity”. This constant may vary with temperature, density, pressure, but the point with Newtonian fluids is that it does not vary with the velocity field (or its derivatives).


ocean water wave photo

What a wave. Its strain tensors must be on fire. Photo by Emiliano Arano on Pexels.com

Later, in section …, this flow will be solved as a solution of the Navier-Stokes equations, the Couette flow. There, it will be shown that the velocity is everywhere in the direction of the force exerted on the upper plane, let us call it $x$, and varies linearly between the planes, in the y direction. Therefore, the only components of the strain rate tensor are \epsilon_{xy} = \epsilon_{yx} = u_0 / ( 2 L ). We therefore have

\tau_{xy} = \mu \epsilon_{xy}.


With this in mind, let us look for a general relationship between \tau and $latex

black click pen on white paper

What a bunch of math. This is so hard. Photo by Lum3n.com on Pexels.com

\epsilon$. This is much easier if we go to the principal strain axes. These are the coordinates on which the strain rate is diagonal. Such coordinate system always exist, since the strain rate tensor is symmetric. Notice that in these system strains are not due to shear, only to dilations.

Tired of that “TeX” look?

TeX has been using computer modern (CM) font since its inception. But that “TeX” look may become a bit tiring. Of course, TeX is a typesetting engine, it is not limited to CM fonts. On the other hand, there aren’t so many fonts around for both the text and the math. (If you have no math,  xeTex makes it easy to use most fonts you can imagine, including the Microsoft and google families).

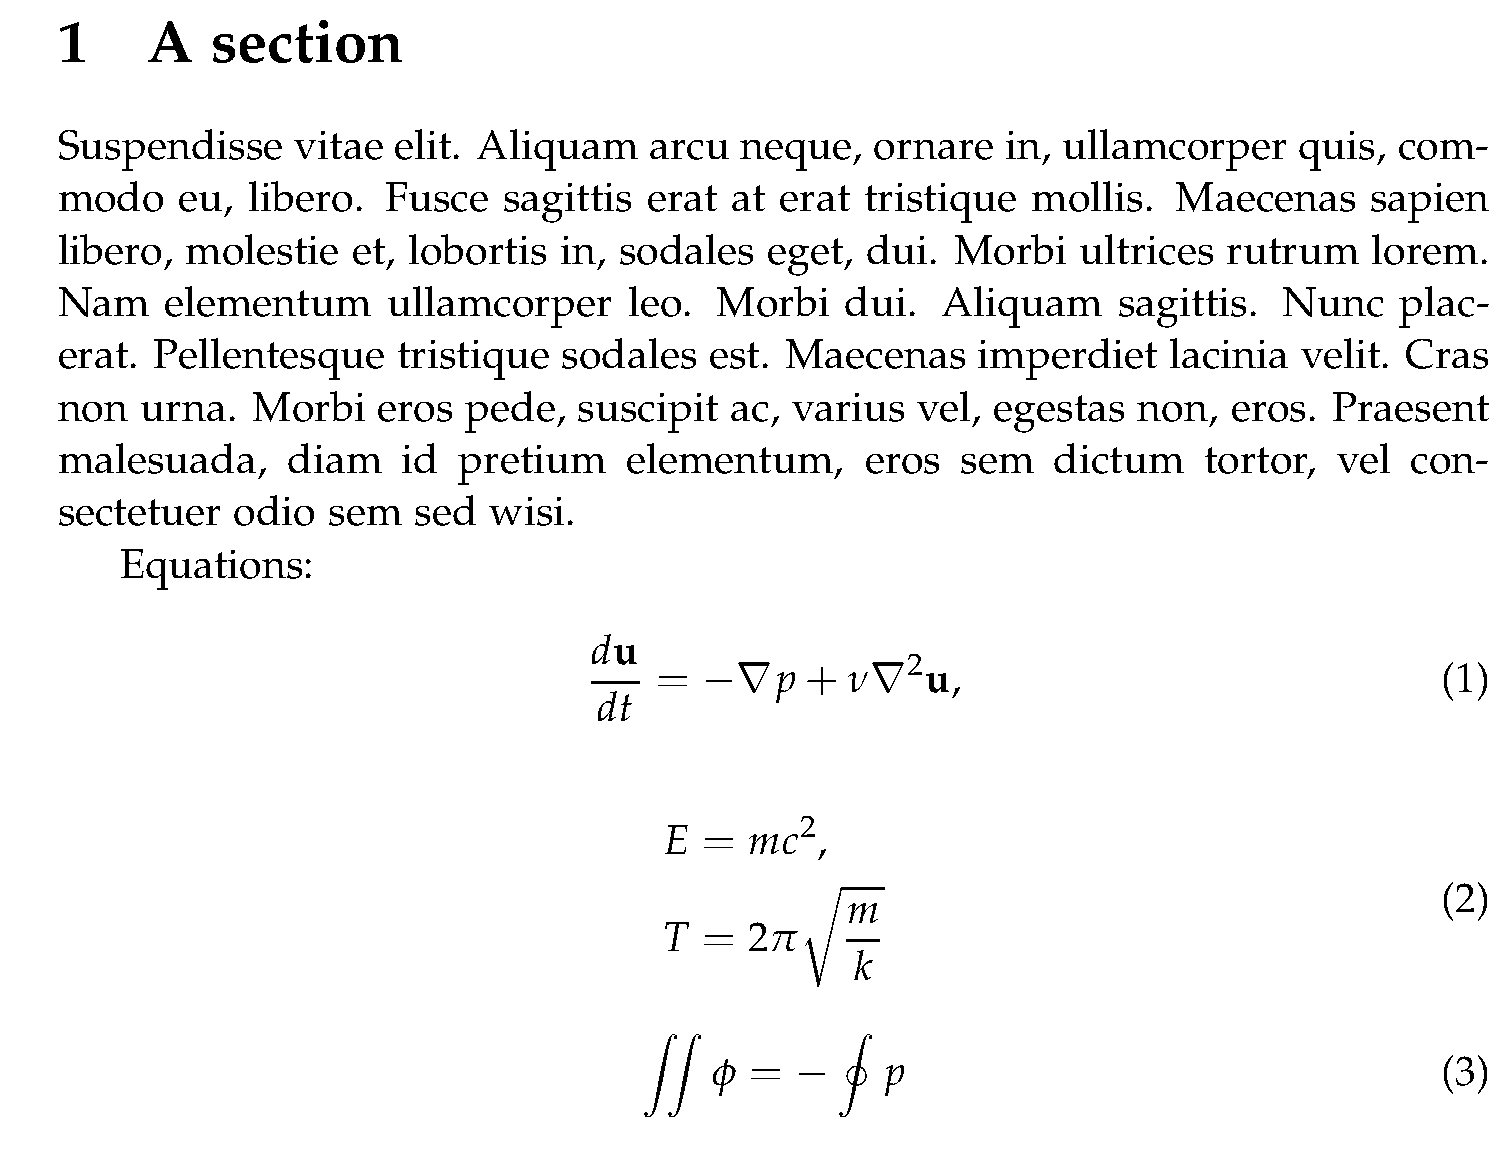
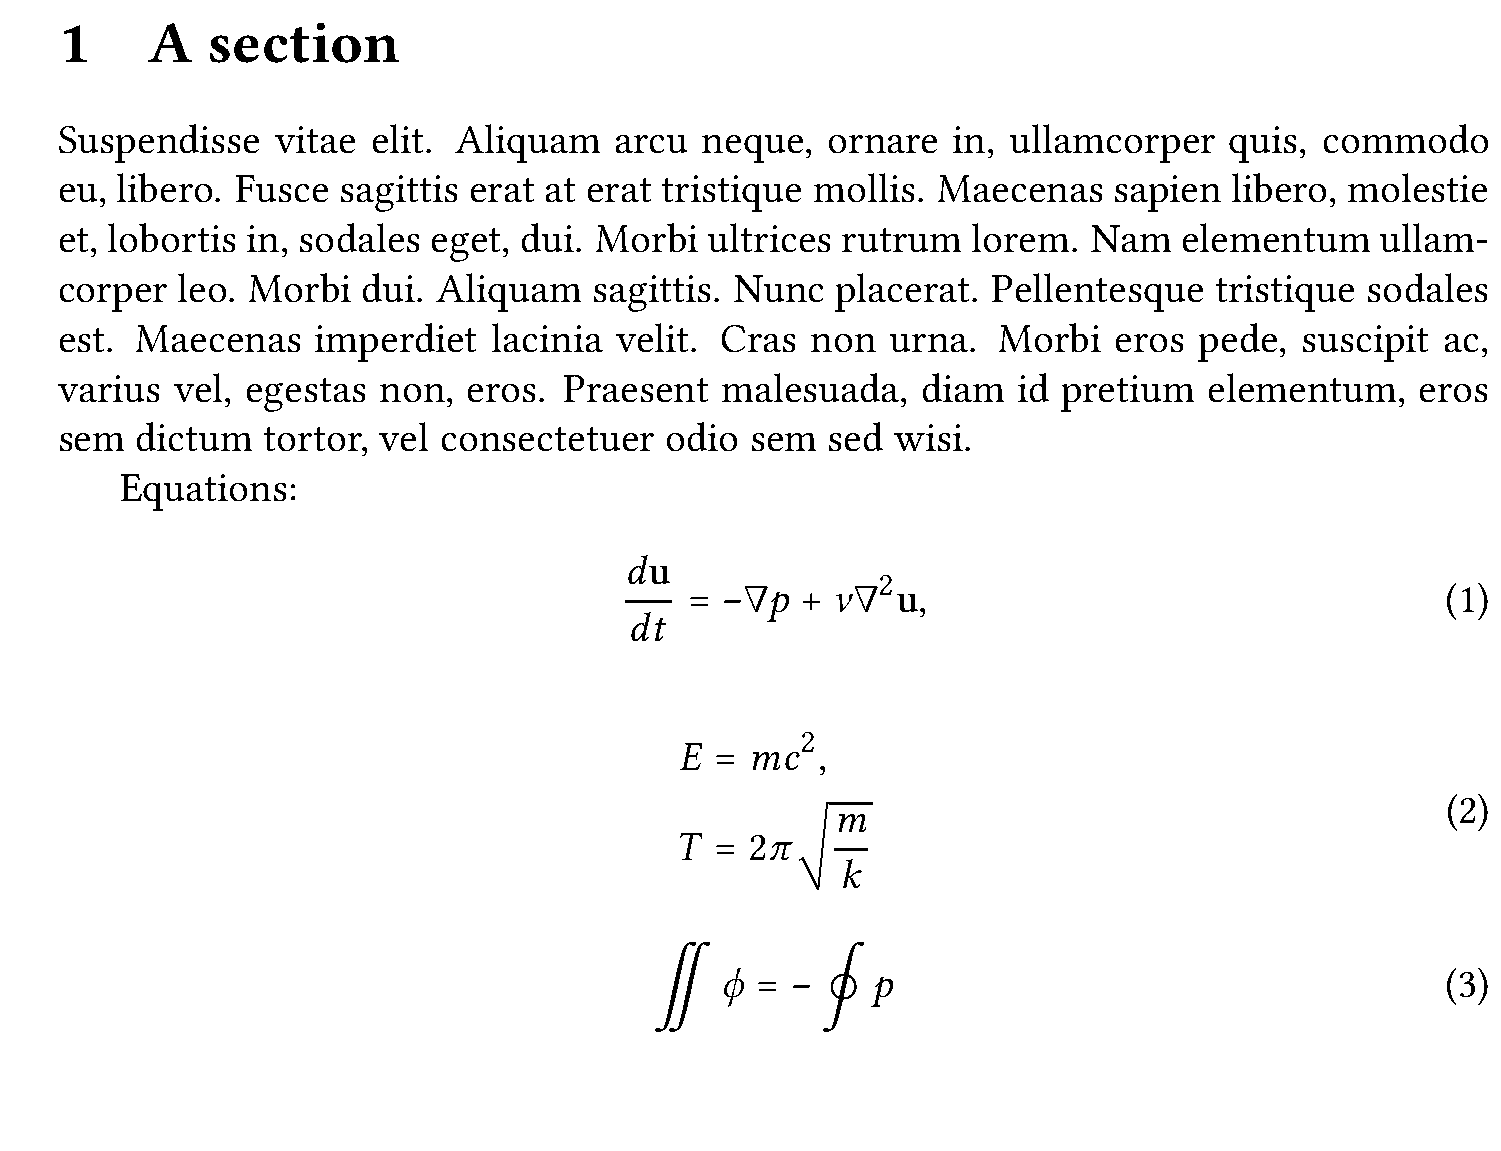
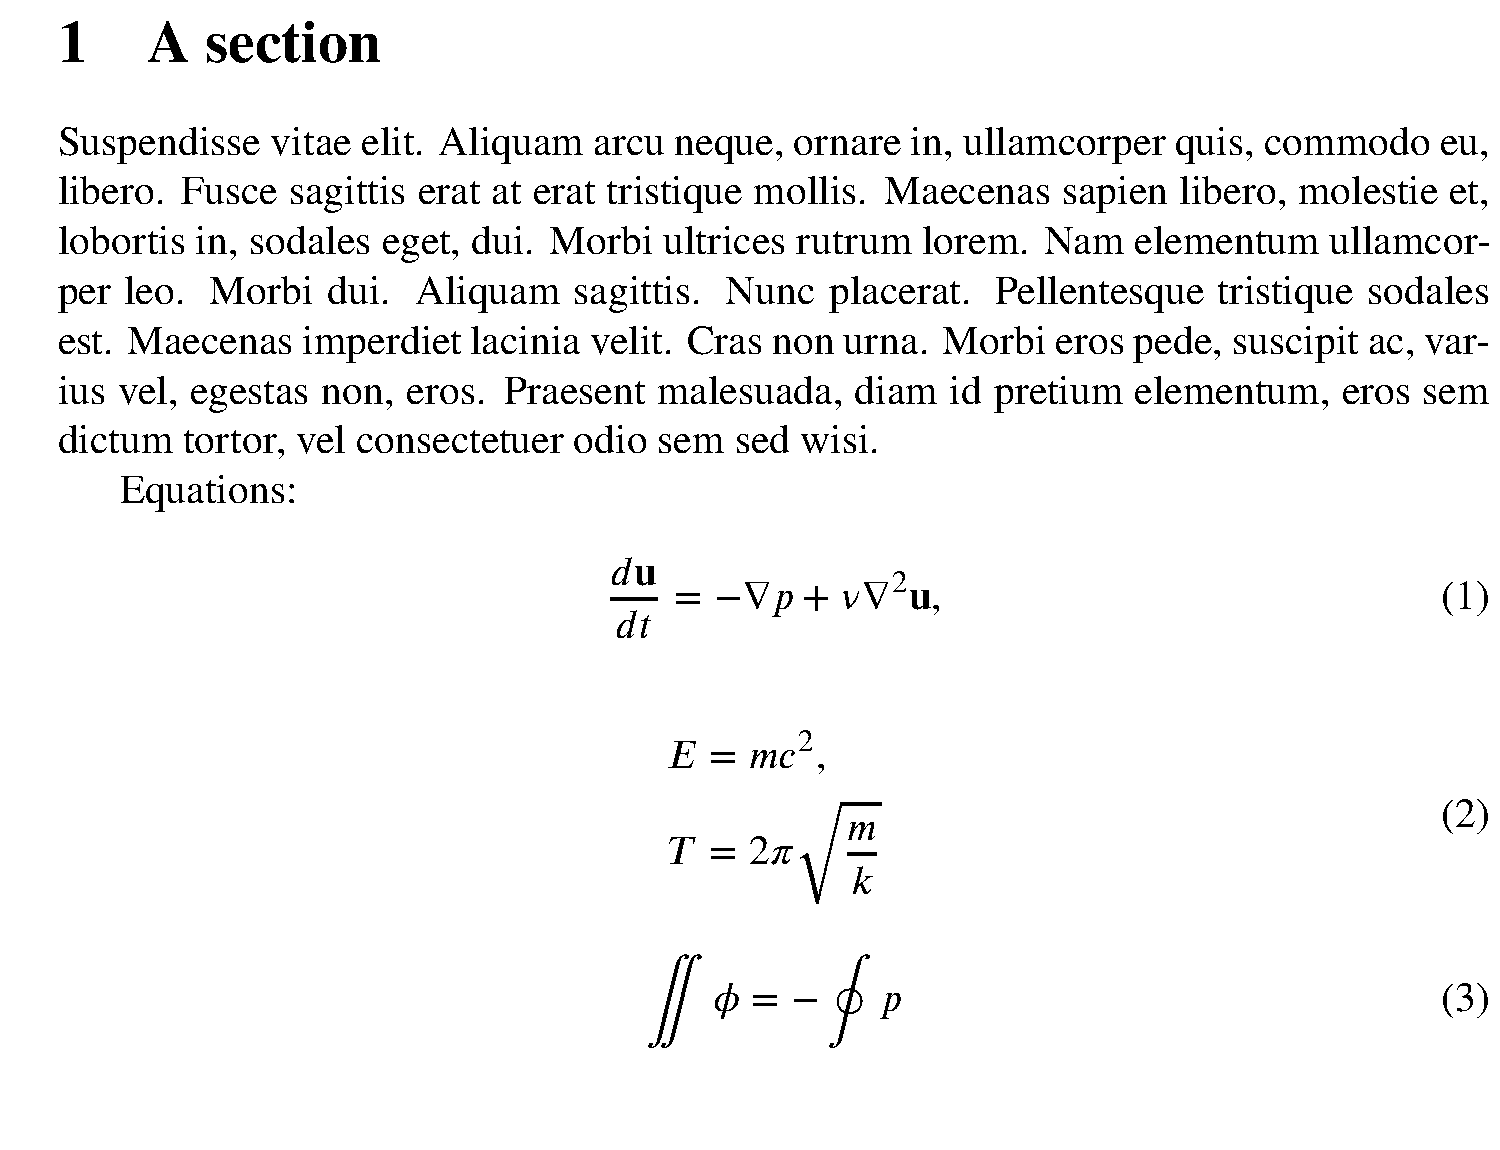
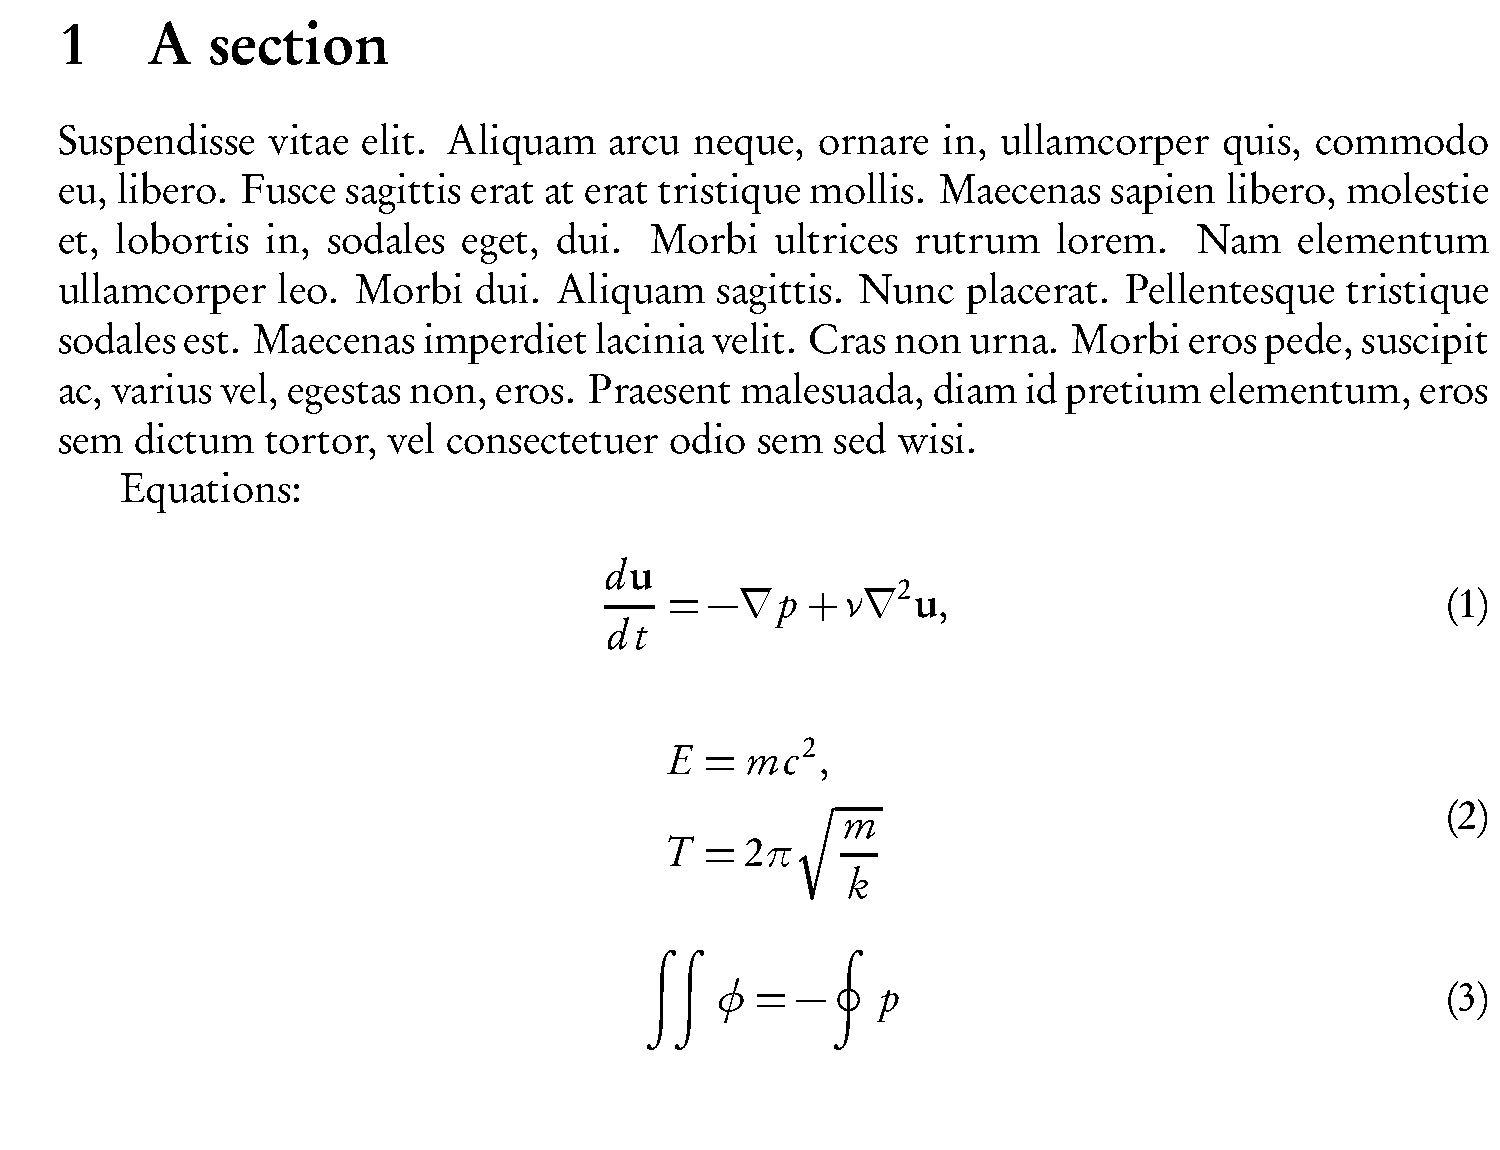
I found a very clear review of existing alternatives at the Font usage post, by Ryosuke Iritani (入谷 亮介). I have taken his suggestions and created a gallery, with a simple sample of text and equations.

More elegant Palatino

\usepackage[sc]{mathpazo}
\linespread{1.05} % Palladio needs more leading (space between lines)
\usepackage[T1]{fontenc}

mathpazo.png

Kpfonts (Palatino-like)

\usepackage{kpfonts}

mathpazo

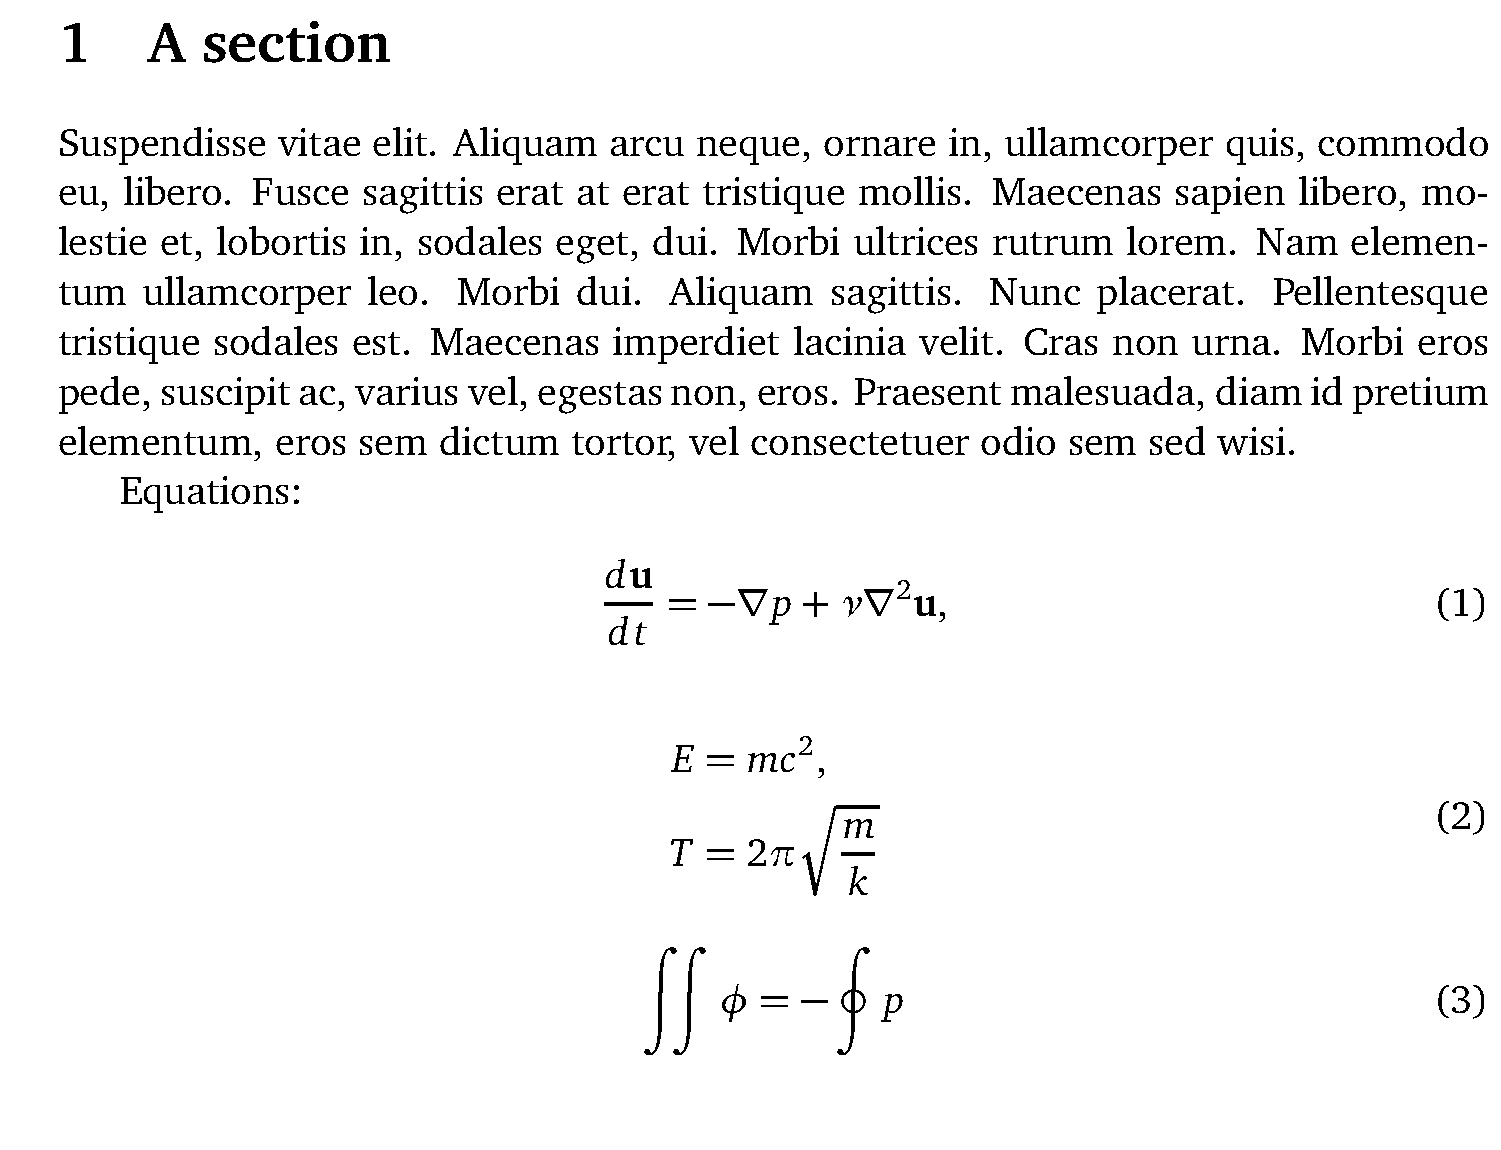
Libertine

Used e.g. in Wikipedia on each sectioning

\usepackage{libertine}
\usepackage{libertinust1math}
\usepackage[T1]{fontenc}

libertine.png

STIX

Scientific and Technical Information Exchange; Times-based but much more elegant than txfonts package.

\usepackage[T1]{fontenc}
\usepackage{stix}

styx

Garamond

It’s a bit thin and less friendly

\usepackage[urw-garamond]{mathdesign}
\usepackage[T1]{fontenc}

garamond.png

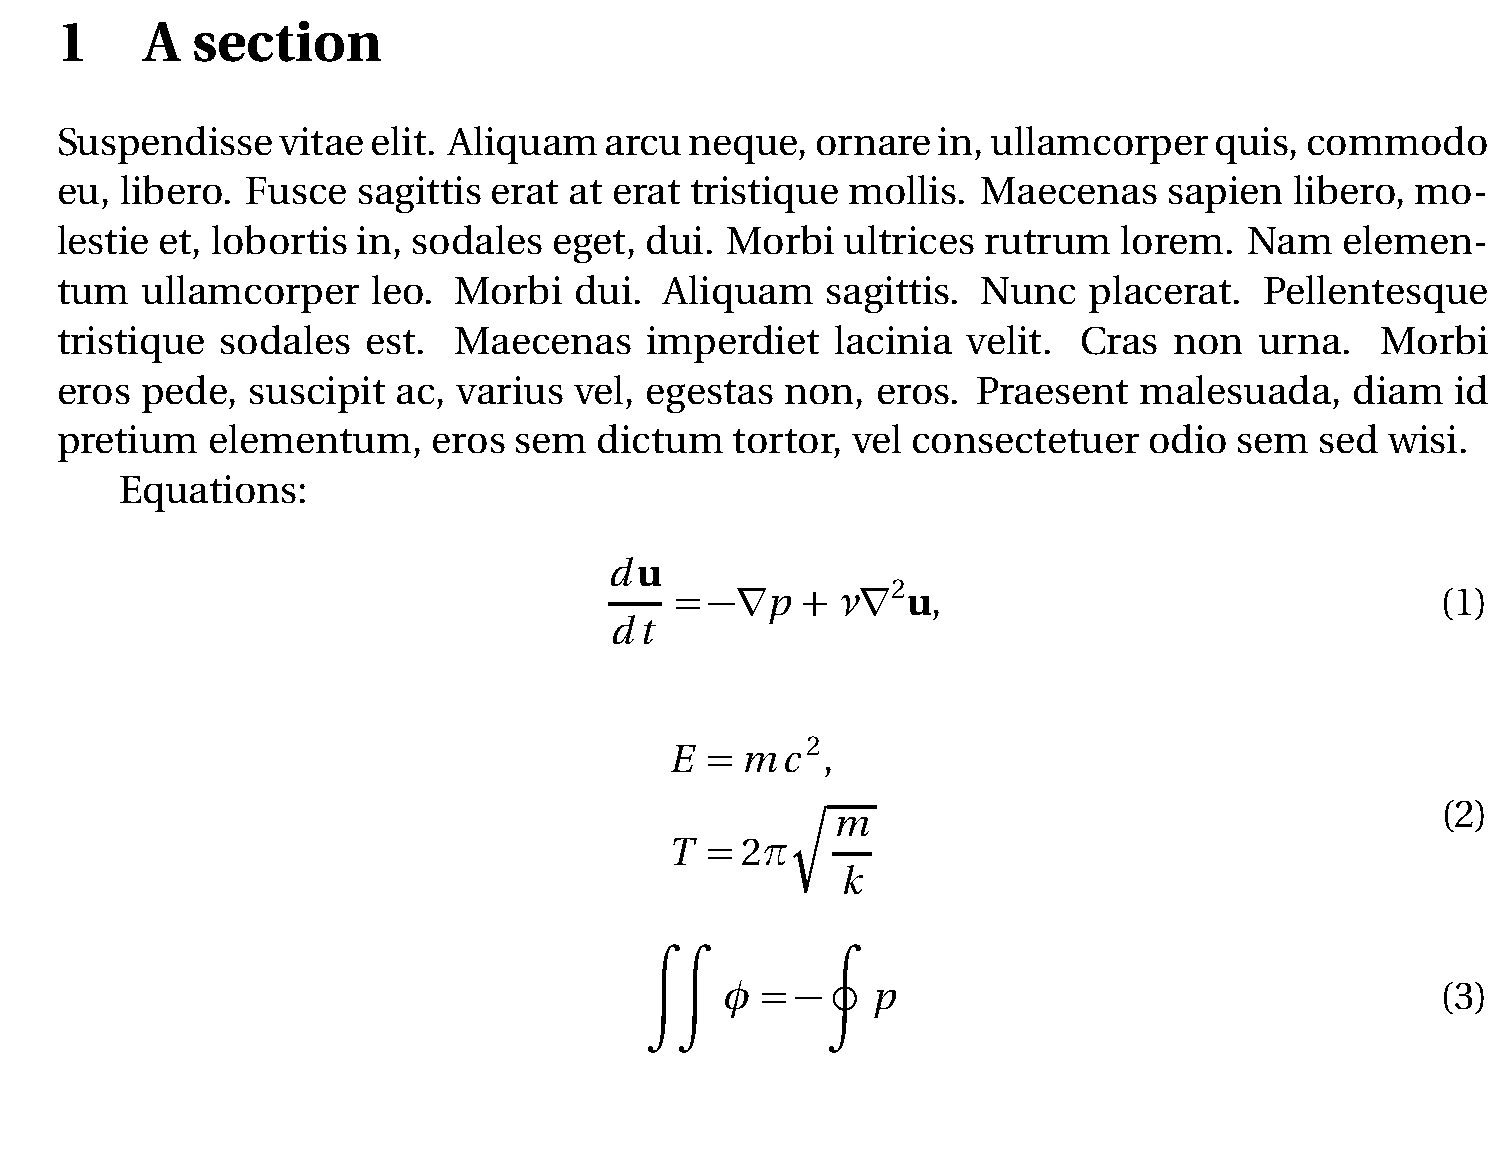
Utopia (Adobe)

\usepackage[adobe-utopia]{mathdesign}
\usepackage[T1]{fontenc}

utopia.png

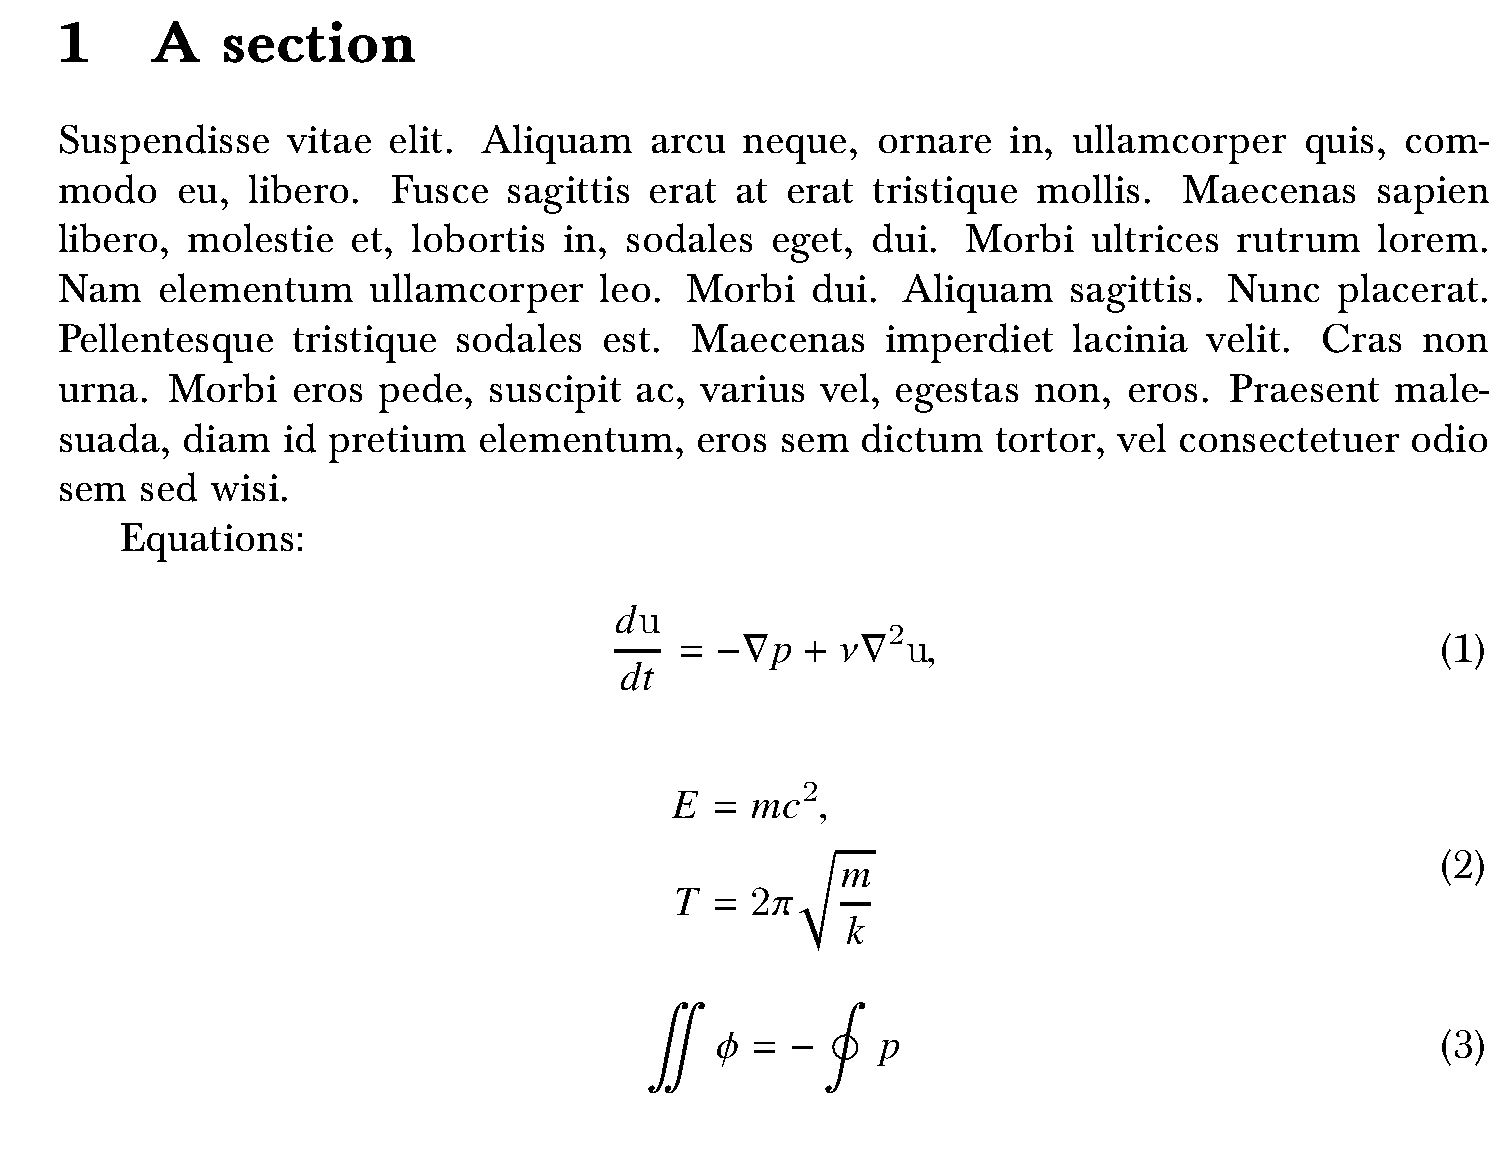
Charter

\usepackage[charter]{mathdesign}

charter.png

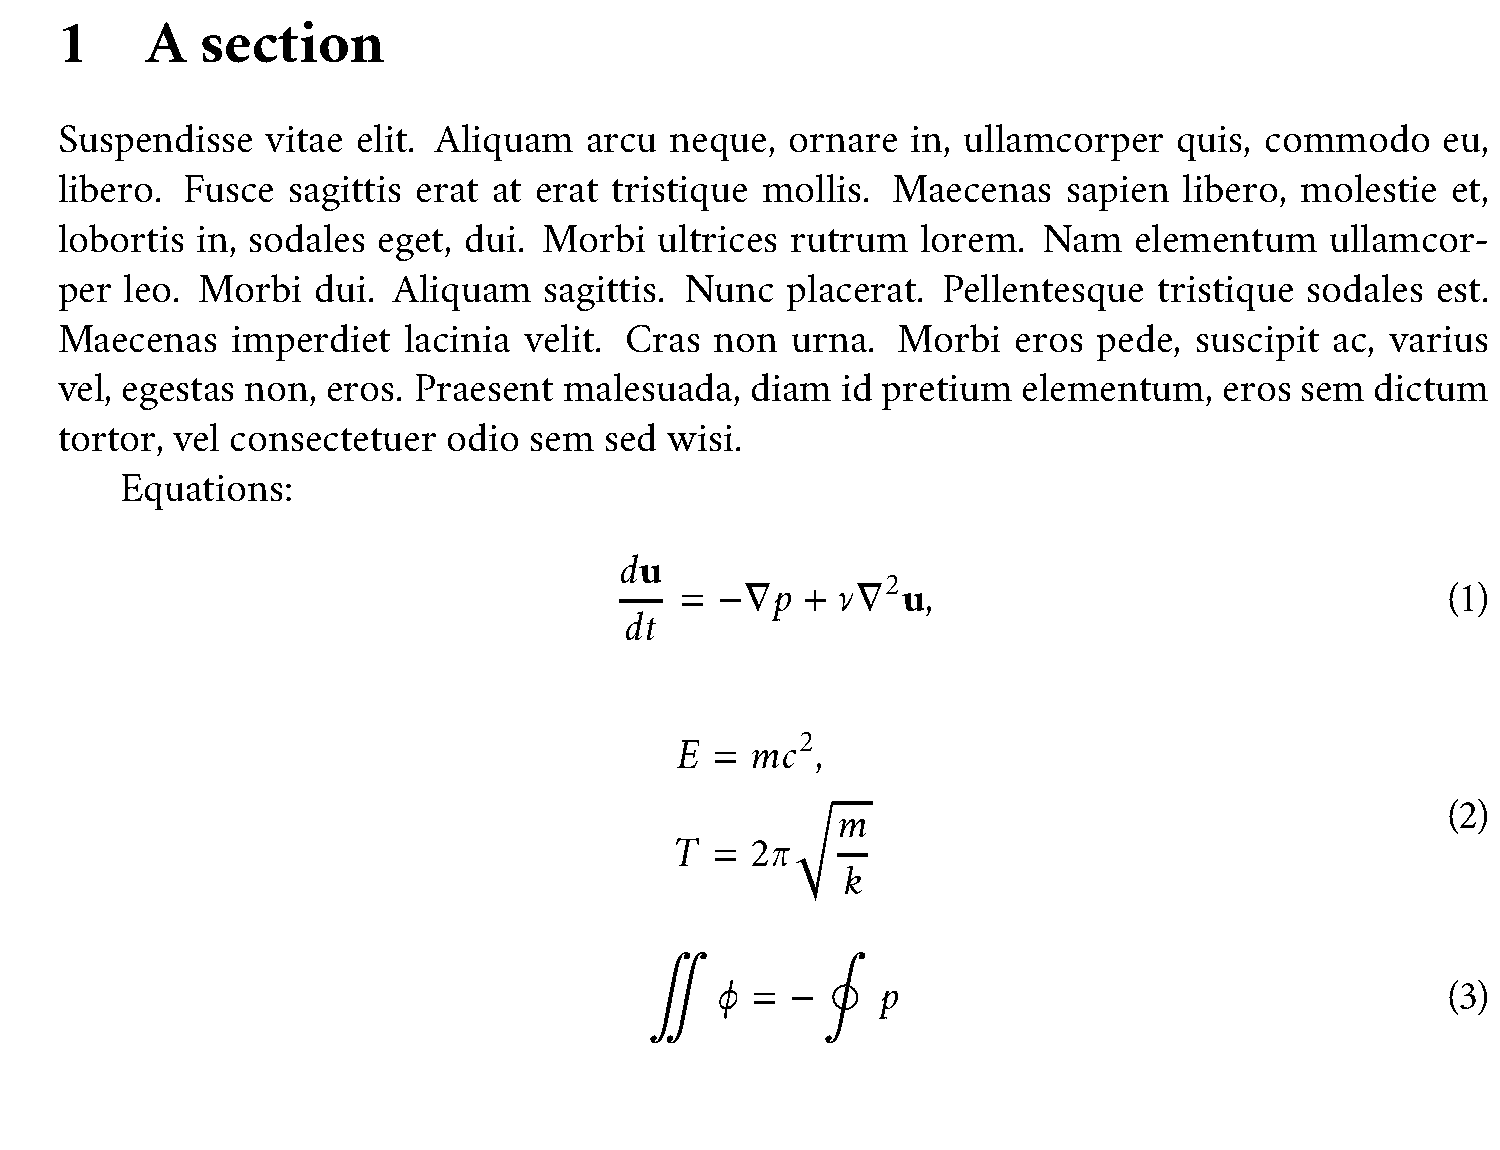
Crimson (with math support)

\usepackage[T1]{fontenc}
\usepackage{cochineal}
\usepackage[cochineal,varg]{newtxmath}

crimson.png

Baskervald

Baskerville-based, thicker font

\usepackage[lf]{Baskervaldx} % lining figures
\usepackage[bigdelims,vvarbb]{newtxmath} % math italic letters from Nimbus Roman
\usepackage[cal=boondoxo]{mathalfa} % mathcal from STIX, unslanted a bit
\renewcommand*\oldstylenums[1]{\textosf{#1}}

baskervald

Helvetica

So far, the only font not included the Iritani’s Font usage post!

\usepackage{helvet}
\usepackage{sansmath}

\usepackage{titlesec}  % this enforces helvetica in section and chapter titles
\titleformat{\chapter}[display]
  {\normalfont\sffamily\huge\bfseries}
  {\chaptertitlename\ \thechapter}{20pt}{\Huge}
\titleformat{\section}
  {\normalfont\sffamily\Large\bfseries}
  {\thesection}{1em}{}

% In main text, at the beginning:
\fontfamily{phv}\selectfont

% before the first equation:
\sansmath

helvetica

The code

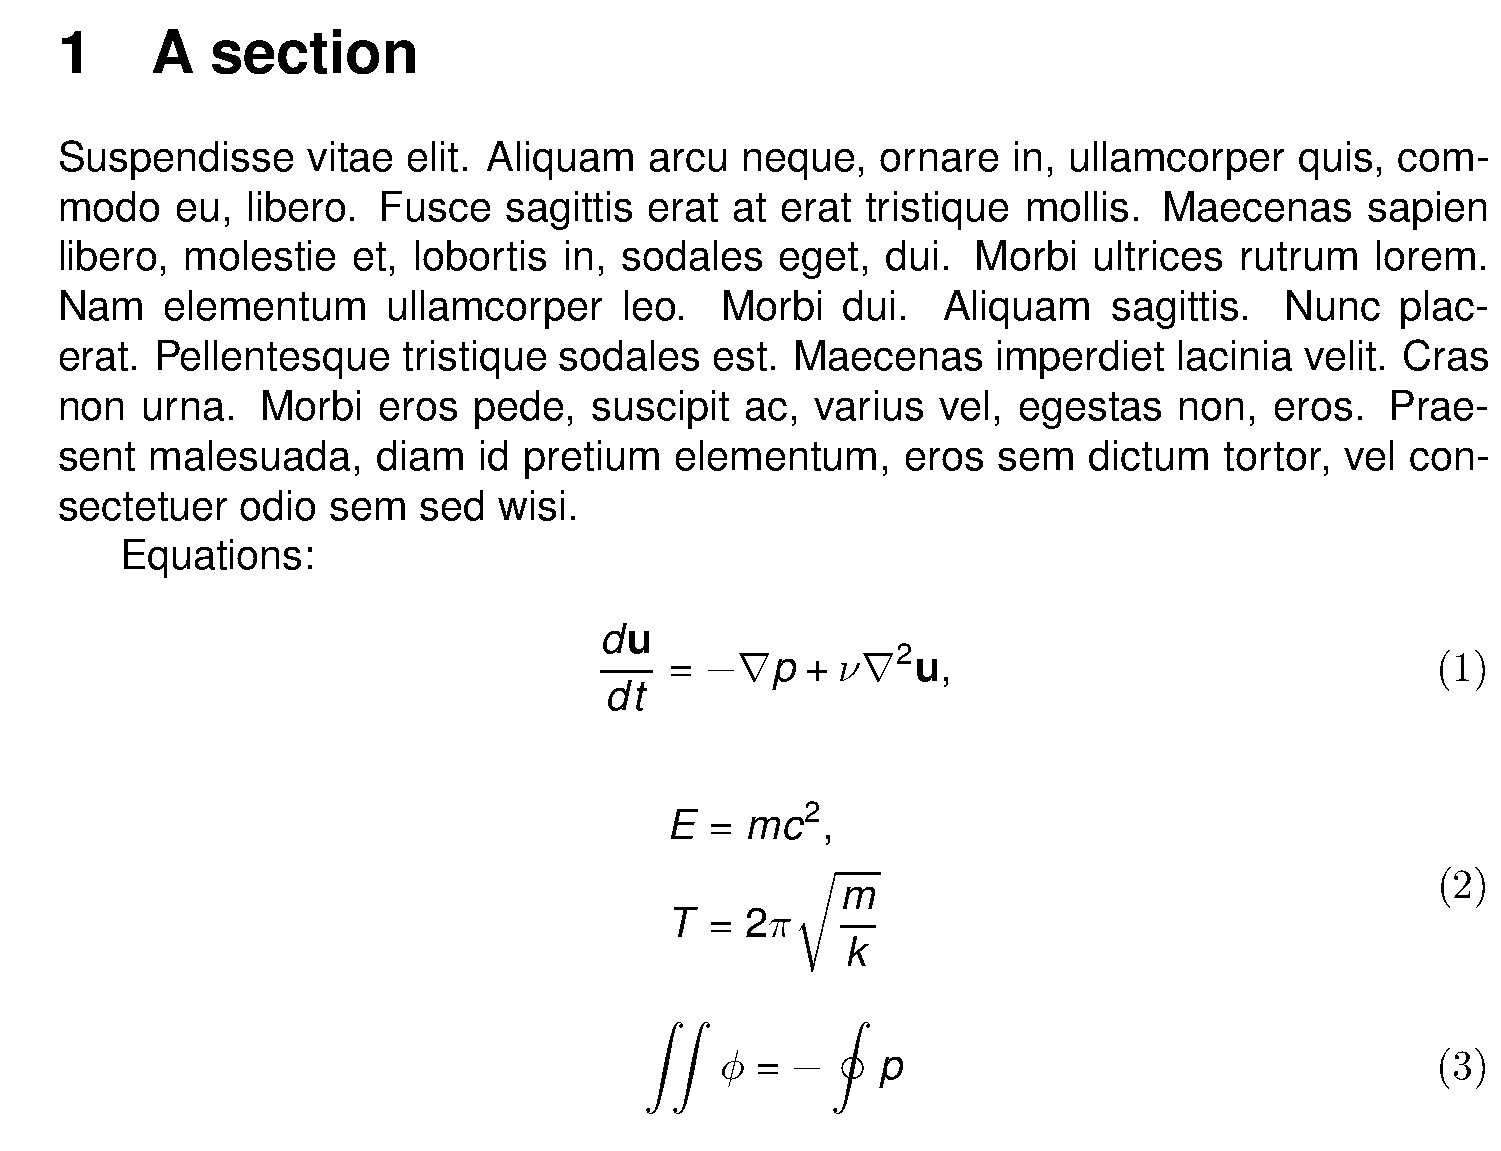
All the above was produced with variations of this file. I just run latex on it, then dvips to get a ps file, which I then crop and export as PNG using the GIMP. Of course, depending on the system, some LaTeX packages may be needed, as well as fonts (I had to install urw-garamond on my arch linux system, for example.)


\documentclass{article}

\newcommand{\bfr}{\mathbf{r}}
\newcommand{\bfu}{\mathbf{u}}
\newcommand{\bfq}{\mathbf{q}}

\usepackage{amsmath}

\usepackage{libertine}
\usepackage{libertinust1math}
\usepackage[T1]{fontenc}

\usepackage{lipsum}% for filler text

\begin{document}

\section{A section}

\lipsum[10]

Equations:

\begin{equation}
\frac{d \mathbf{u}}{d t} = - \nabla p + \nu \nabla^2 \mathbf{u},
\end{equation}

\begin{equation}
\begin{split}
E &= m c^{2},\\
T &= 2\pi \sqrt{\frac{m}{k}}
\end{split}
\end{equation}

\begin{equation}
\iint \phi = - \oint p
\end{equation}
\end{document}

Plotting 2D column-shaped results with python

Ok, so you have your computational output of a set of 2D points. You have been lazy and done the obvious stuff: arrange them in columns, with the first one being the x coordinates, second one the y coordinate, then come the fields, which may be scalar (one column each), or vector (two columns each, one for each coordinate). How to visualize them?

With python, start with

ipython --pylab

Then, read the data

In [4]: dt = loadtxt( ‘1/mesh.dat’ )

In [5]: shape( dt )
Out[5]: (1024, 27)

Notice the last command tells us we have 1024 data points, and 27 fields (well, 25 + positions). For convinience, assign columns to arrays:

In [6]: x=dt[:,0]; y=dt[:,1]; al=dt[:,4]

Now x and y are positions, and “al” is the scalar field for the fifth column (number 4, since counters start at 0 in python).

To visualize the positions,

In [7]: scatter( x , y )

A scalar field may be visualized with a color map:

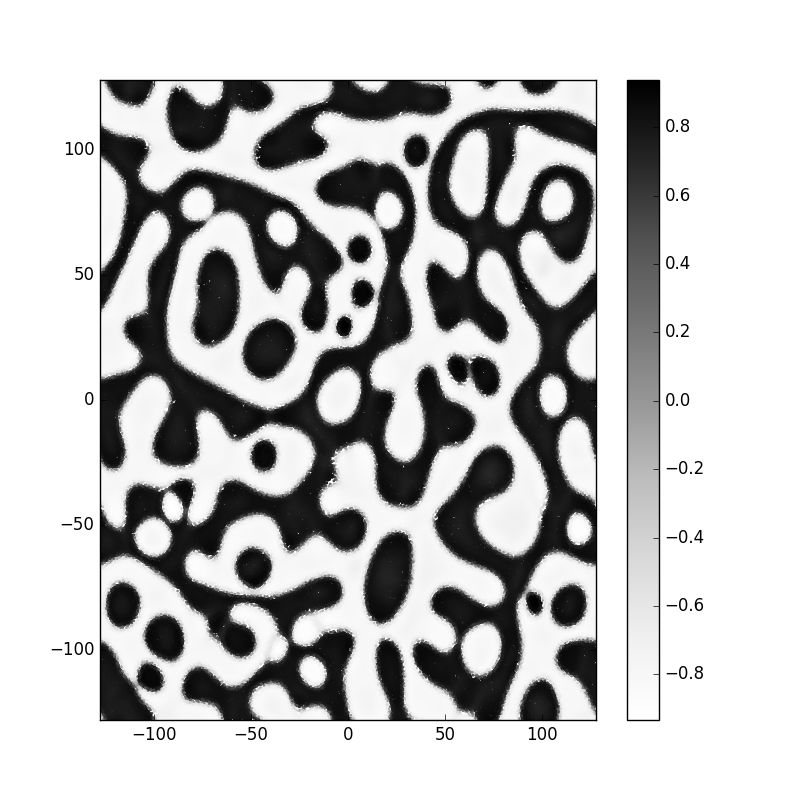
In [9]: scatter( x , y , c = al )

The “c=” means the color is taken from field al. One may fiddle with colormaps and symbol sizes:

In [9]: scatter( x , y , c = al , cmap= plt.cm.Blues, s=8 )

To know the range we are plotting, produce a color bar:

In [19]: colorbar()

Remember each plotting is overlaid on the previous one, so it is necessary to blank the plot from time to time:

In [11]: clf()

For vector fields, assign coordinates to two separate arrays:

In [20]: vx=dt[:,8]; vy=dt[:,9]

Then, use “quiver” to get a vector plot:

In [22]: quiver( x, y, vx , vy )


Grabaciones al aire libre

El otro día tuvimos que grabar una película al aire libre con los niños. Un sitio público, gente pasando, lluvia cayendo en todas partes (en particular, en los paraguas que protegían cámara y presentadores). En resumen: buena calidad de vídeo (cámara Canon de fotos, con posibilidad de hacer películas), audio horroroso. Por suerte, uno de nosotros tuvo la idea de grabar el audio con un teléfono móvil, a modo de micrófono. Esto permite mejorar mucho la calidad de audio en producción, como sigue:

  • Se monta la película del modo habitual (seleccionando escenas, transiciones, cortando, etc). (Seguimos usando el windows movie maker, aunque hay opciones interesantes como openshot.) Es mejor no añadir música en este momento, aunque si se hace tampoco pasa nada.
  • Una vez terminado el montaje, se extrae la banda sonora entera y se graba (en ogg preferiblemente, o en mp3 de buena calidad). Este paso es sencillo, el mismo VLC player lo hace)
  • Se importa la banda sonora en un programa de edición de audio tipo DAW (yo uso Cubase 5). Esta es la pista 1. (En principio, un DAW puede importar directamente el audio de un vídeo, pero el Cubase 5 está algo atrasado en cuanto a codecs.) Sobre DAWs, por cierto: están apareciendo varios gratuitos (al menos, para pocos proyectos) que son online (bandlab, soundtrap) ; pueden ser una buena alternativa a DAWs tradicionales.
  • En otras pistas, se importan los ficheros del móvil. (De nuevo, fue necesario VLC para transferir el formato de audio moderno, mp4, a ogg que pudiera leer el Cubase 5; hay que hacerlo uno por uno, lo cual es bastante tedioso, habría que investigar si p.e. audacity lo puede hacer mejor.)
  • Bajo la pista 1 creamos la pista 2, de mejoras. Pasamos el audio de la pista 1 al canal izquierdo estéreo, y el de la pista 2 al derecho.
  • Se va escuchando sólo la pista 1 para encontrar los fragmentos de audio; luego, los localizamos en las pistas de teléfono. Una vez que hemos encontrado el fragmento con audio bueno, lo subimos a la pista 2.
  • Sincronización: gracias a la separación estéreo de canales, es bastante sencillo desplazar con cuidado los fragmentos de la pista 2 hasta que están en sincronía con la 1. Cuando lo conseguimos, cortamos el fragmento de la pista 1 que hemos sustituido y lo mandamos a – infinito para que no suene (se puede borrar también, pero así no se pierde información).
  • Así con todos los fragmentos. Al terminar, se aplican inserciones estándar a la pista 1 y a la 2 (compresión, gate de ruido, ecualización, etc), se colocan las dos en posición estéreo neutra, y se exporta la mezcla de estos dos canales.
  • Finalmente, con el programa de edición de vídeo se sustituye totalmente el audio con la nueva banda sonora. Puede añadirse ahora música si no se ha hecho antes.


A markdown test

This is a test of markdown blog writing. The writing comes straight from my website on CFD methods. These were written in markdown under reveal.js, for quick and nice lecture slides. Some changes had to be made:

  • LaTeX must start as “dollar sign latex” … “dollar”
  • Links to local files (such as pictures) don’t work
  • Lists (such as this one) do not seem to work well


Muy a menudo, se parte de las EDPs, conocidas, por ejempo:

\frac{\partial u}{\partial t} + c \frac{\partial u}{\partial x} = 0

Estas se discretizan: sustituyendo las derivadas por diferencias.

Sin embargo, este es un proceso de ida y vuelta, porque
las EDPs se deducen a nivel discreto.

Deducción


Se suponen cambios de un campo u sólo
en la dirección x

Esquema de convección en 1D


Esquema de convección en 1D

conveccion_1d

parts_bw_values_250


El cambio en la cantidad total A \Delta x \, u_i será:

\frac{d }{d t} (A \Delta x \, u_i ) = \Phi_{i-1/2} - \Phi_{i+1/2}

Flujos, convección

Antes los flujos por las caras venían dados por:

\Phi_{i-1/2} = A c \, u_{i-1/2}

\Phi_{i+1/2} = A c \, u_{i+1/2}

\frac{d }{d t} (A \Delta x \, u_i ) = A c \, u_{i-1/2} - A c \, u_{i+1/2}

Quick von Neumann stability analysis

von Neumann stability analysis is a great tool to assess the stabilty of discretizing schemes for PDEs. But too often, imho, the discussion is too convoluted. Here, I try to provide a shortcut.

In a nutshell:

  • The standard approach involves Fourier techniques, involving (of course) complex numbers
  • The real part of these numbers is analysed, with some trigonometric expression resulting, identifying the troublesome modes
  • I claim this mode can be identified in advance, which makes the whole Fourier procedure unnecessary

BTW: it’s pronounced “fon no ee man”

parts_bw_values_250

Continue reading